Making a next-level website with Nuxt.js/Vue, Markdown, and Netlify - Part 1
Use the JAMstack to make a static site which requires only a domain.
Welcome to my site! If you like it, you can easily make one of your own by following the instructions below. And if you don't like it, make a better version and send me the link! I'd love to improve.
Why use...
the JAMstack?
The JAMstack is a new way of architecting websites that takes advantage of new technologies to effectively remove the need to create a backend for your app. JAM stands for Javascript, APIs, and Markup. No longer do you need to write a backend and host it on a web server. Especially for simple, content-oriented websites, the JAMstack greatly lowers initial setup time as well as decreasing long-term maintenance costs, with the additional benefit of easy performance. The JAMstack is also highly decoupled, meaning we can try out new technologies at any time.
Plus as a side benefit, a setup like this one has no ongoing costs other than the domain! So it's easy to try out and keep as long as you like it.
Nuxt?
Nuxt is a framework that sits on top of Vue.js, Vue Router, and Vuex and provides server-side rendering (SSR) or in our case, static site generation. It wraps the entire Vue package into an easy to use setup perfect for content-based websites. If you're not familiar with the Vue.js stack, check out the websites linked above for more information.
Where's our database?
Instead of spinning up a database and making sure to take snapshots, backups, etc., Github becomes your database and source of truth. Publish a new post? Just merge a pull request and you're good to go.
Additionally, we'll eventually use Markdown to write our posts, meaning that if we ever want to switch out our CMS, we can do so without too much effort.
Netlify?
Netlify is a platform which provides automated CI/CD and hosting for web-based projects. It is extremely simple to set up and integrates perfectly. Netlify makes it so that every time you update the master branch in Github, your code will be automatically built and deployed.
Setup
Let's get the prerequisites out of the way.
Required
- A Github account. This will be our code repository/database.
- A Netlify account. We will be using Netlify to provide hosting and CI/CD.
- Install Node.js if you don't already have it.
Optional
- Eventually you'll want a domain name. You can sign up for one at any number of websites, although I prefer DNSimple for their simple interface, transparent pricing, and solid support.
- If you're on Windows, you'll need the windows-build-tools before you can run the Nuxt.js setup. You can do this by running this command (it takes a while):
npm install --global --production windows-build-tools
Get the template up
First, let's create our project. Run this with your project name of choice.
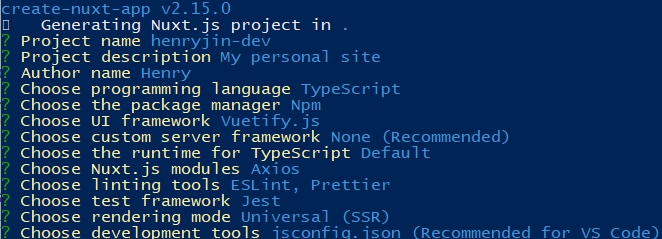
npx create-nuxt-app <project-name>
Work through the options. You can see what I selected below, but feel free to modify the options as you see fit. You can always add or remove packages later.
Once Nuxt finishes creating your project, you'll have a folder with lots of folders and files in it. Navigate to this folder and make sure the following command works:
npm run generate
This runs the static site generator of Nuxt, which takes our Vue files and turns them into HTML which you can see in the dist folder. Once this command runs successfully, we're ready to go to production!
Production already?
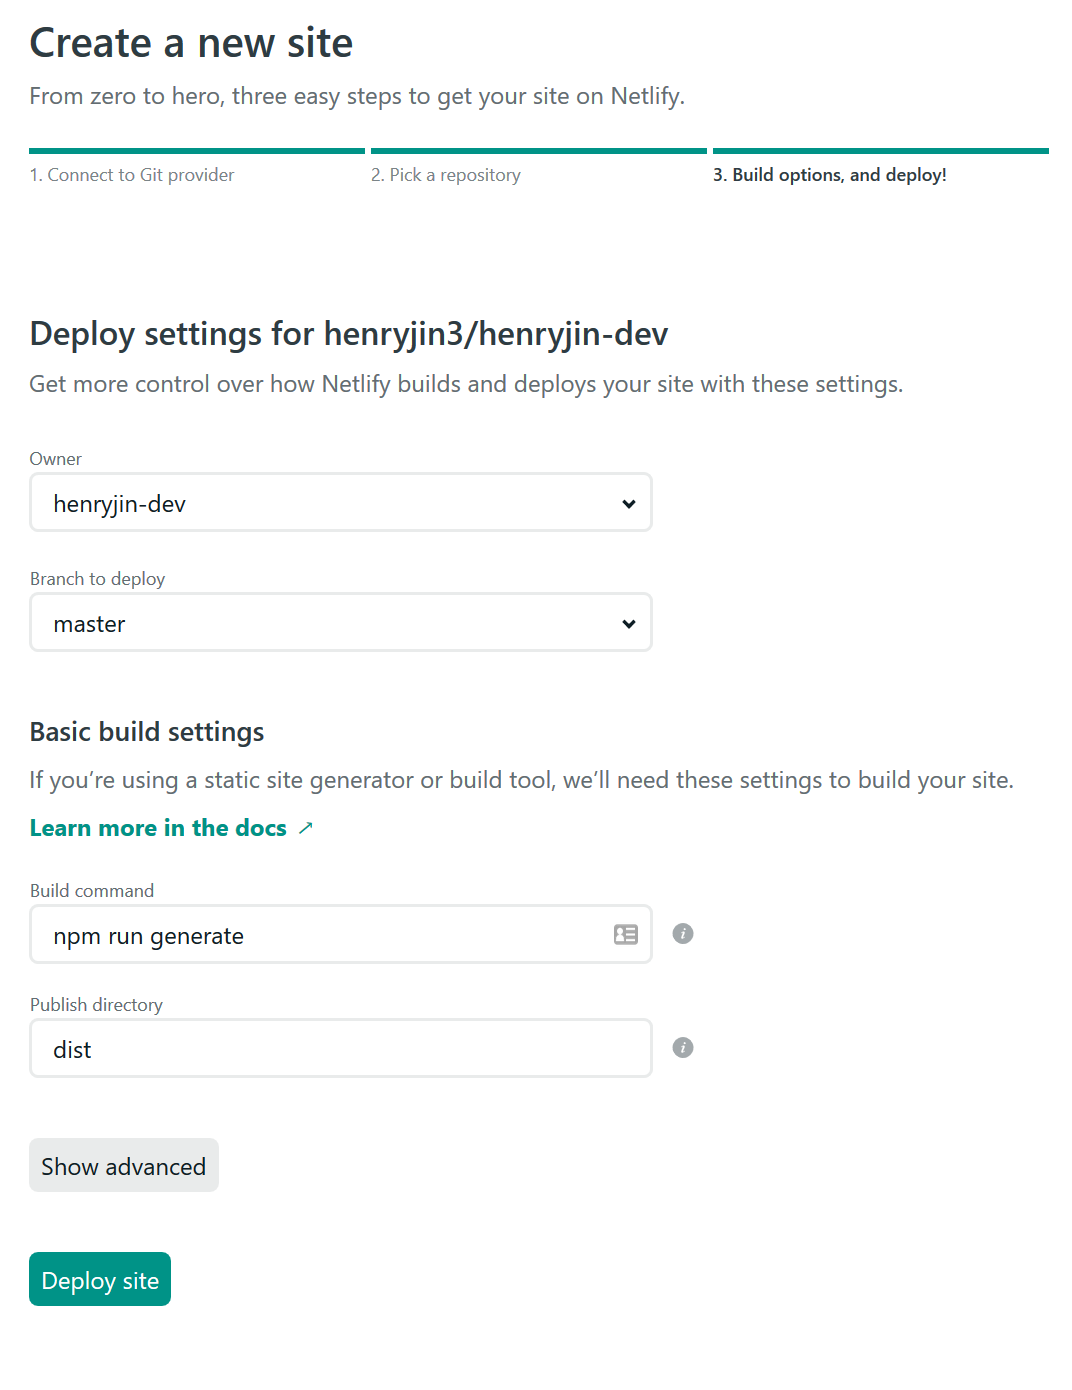
In your Netlify account, go to Sites and click "Add new site from Git". You'll then need to do an OAuth connection with Github and give Netlify access to your repo. After that, make sure you set up the build command as npm run generate and
publish directory as dist. It should look like this:
And you're done! Watch it build and make sure it deploys correctly, and you'll then be able to see your new site at <project-name>.netlify.com. Time to celebrate, right? We'll come back and hook up Markdown in Part 2.