How to set up Continuous Delivery using Heroku Flow
Continuous deployment doesn’t need to be this hard to set up.
Intro
Continuous deployment doesn’t need to be this hard to set up.
Over the past decade, continuous integration (CI) and continuous delivery (CD) have become staples of the software development lifecycle. CI automates the process of merging code and checking for basic regressions and code quality issues, relieving some of the code review burden on your dev team. CD and automated deployments eliminate the overhead involved each time a new feature or a hotfix needs to get deployed.
Imagine if there were no more nights and weekends spent packaging up builds and manually deploying across servers! A functional CI/CD setup makes it significantly easier to have a truly agile workflow, as you can deploy as frequently as you want to.
However, CD in particular can be difficult to setup, oftentimes involving learning a whole new set of skills involving Dockerfiles, YAML, and the idiosyncrasies of each app and environment. Especially for smaller teams, these complexities make the idea of having automated deployments just a dream. Continuous deployment doesn’t need to be this hard to set up.
As a full-stack developer and consultant who often helps dev teams to increase the value they deliver each sprint, when Heroku Flow came onto my radar I knew it was time to take a closer look. Could this be the simple, straightforward solution I’d been looking for?
What is Heroku Flow?
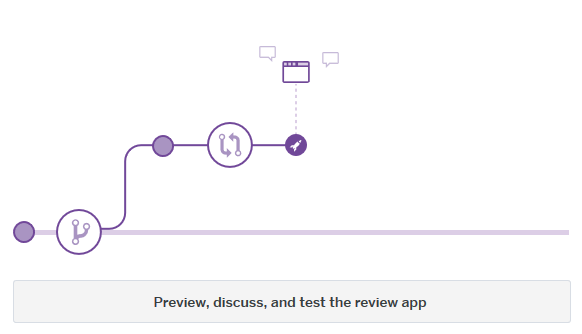
Heroku Flow is the umbrella for a few different Heroku products which work together to provide a full CI/CD suite of tools. For CI, there’s Heroku CI. For CD, there is Heroku Pipelines, which allows you to specify a group of environments within which to promote builds, and Heroku Review Apps, which give you on-demand builds of each pull request. Bringing it all together is the GitHub Integration, which allows the process to be automatically triggered simply by pushing to your default branch.
Let’s set up a sample application and see what it takes. Do note that Heroku Review Apps is currently only available with the GitHub Integration.
How to Set Up Heroku Flow
First, you will need an application to set this up on. If you’re just trying things out, feel free to fork my sample application. It’s a basic Next.js application with a simple unit test added.
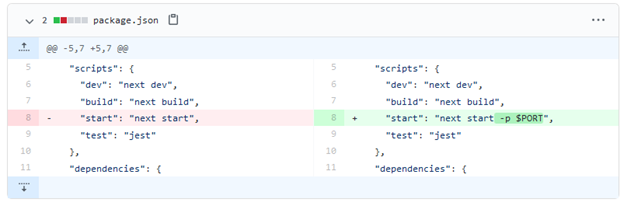
If you are adding your own Next.js application, do note that you will need to add a PORT arg to the start command, as below:
From there, sign up for a Heroku account and let’s get started!
Heroku Pipeline
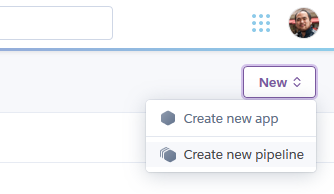
In your Heroku dashboard, create a new pipeline:
Give it any name you like.
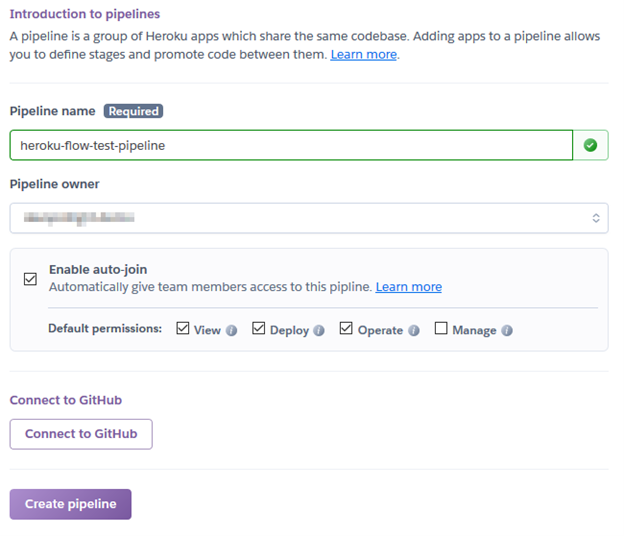
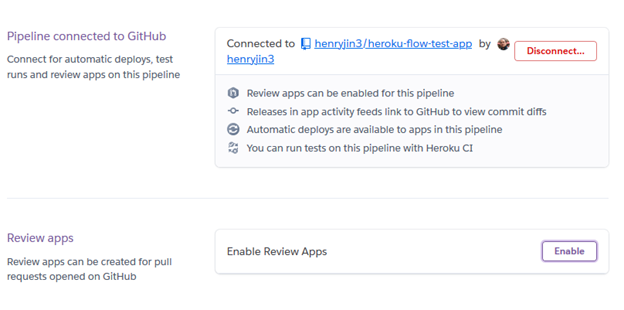
You can either connect it to GitHub on creation, or you can do so after creating the pipeline:
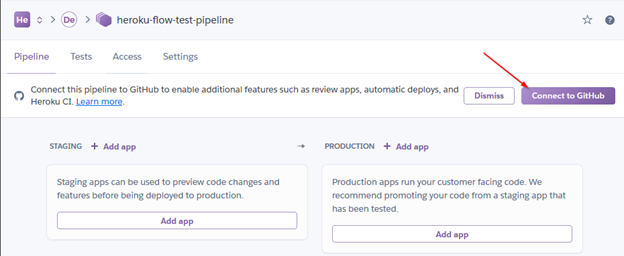
And the pipeline is created! Let's keep moving.
Heroku Review Apps
Let’s turn on Review Apps:
You’ll see a number of options. As a default configuration, I recommend the following:
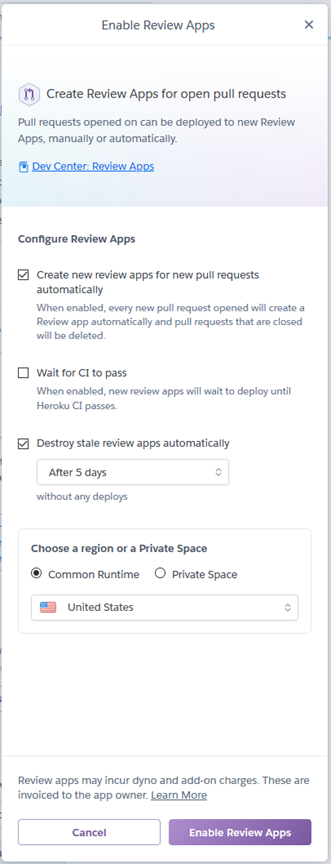
Wow, that was easy too! Just a couple more steps to go.
Adding Environments and CI
With the pipeline created, now we need to add some apps to it. I’ll add staging and production environments:
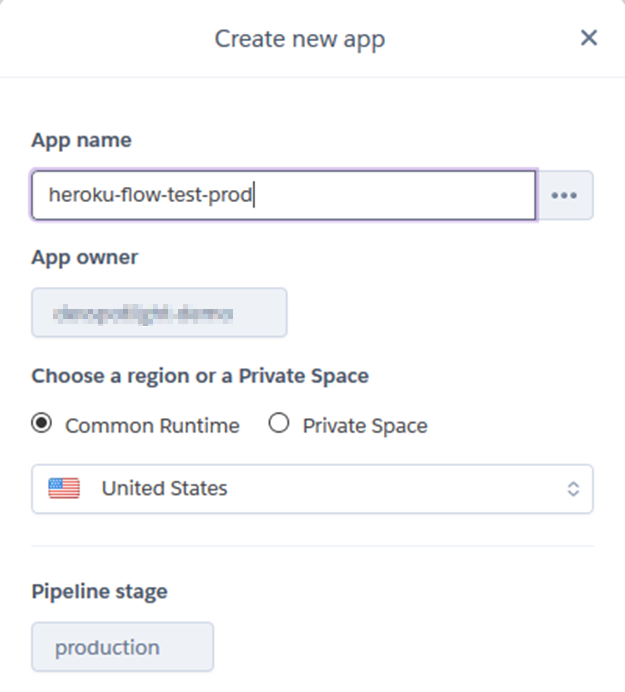
Do this twice, once for each environment. You should end up with something like the screenshot below:

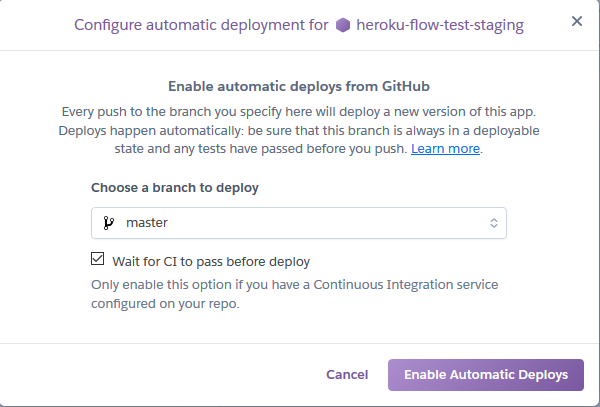
I also recommend setting up automatic deployments to whatever your first environment is. For me, it’s Staging:

Finally, let’s turn on CI as well. One more click and we’re done.

That’s it! What, you don’t believe me? Don’t believe that it could really all be working that easily? Well, let’s test it and see, shall we?
Testing Heroku Flow
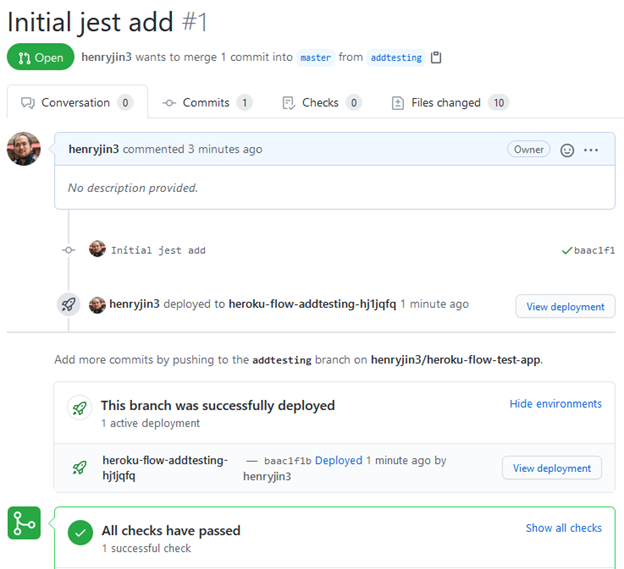
Ready to try everything out? Create a pull request in your repo. For me, I decided to create a PR around adding unit tests. You should see something like this once you’ve created your PR in GitHub:

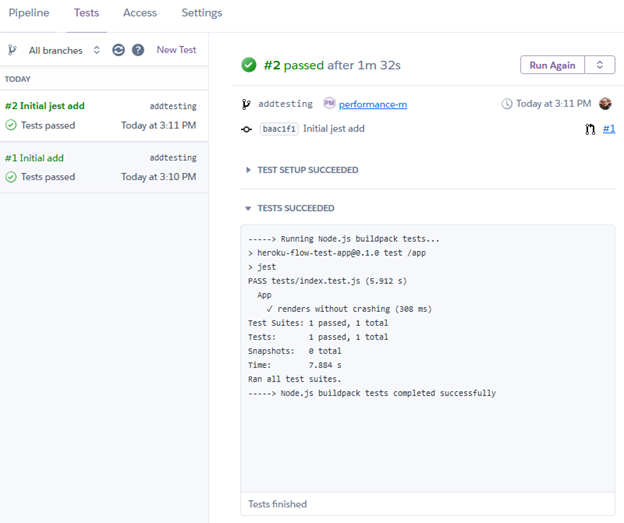
Clicking "Details" takes you to Heroku’s site, where you can see the CI's status.
Alongside the CI (or after, depending on your settings), deployment of the review app will occur as well. Note: if you selected the option to deploy the review app after CI, but you have no tests, it won’t deploy. So make sure you have at least one test!
Click “View deployment”, and you will be taken to your review app. If you’re using my sample application, you’ll see the following:

Looking good? Let’s go ahead and merge the PR. Then, you can check out whichever environment you set up automatic deployments for. In my case, it’s the Staging environment:
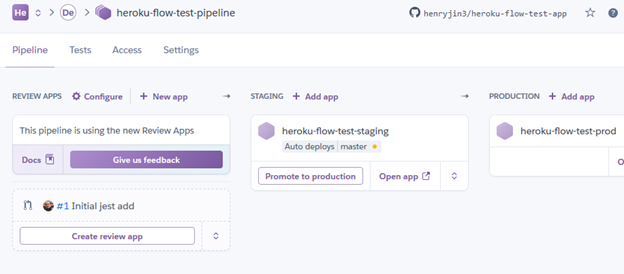
See that yellow circle? Once it’s green, you’re ready to go:
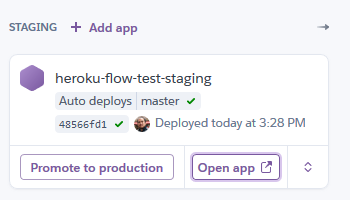
Click “Open app”, and make sure everything looks good. Ready to go to production? Just click “Promote to production”.
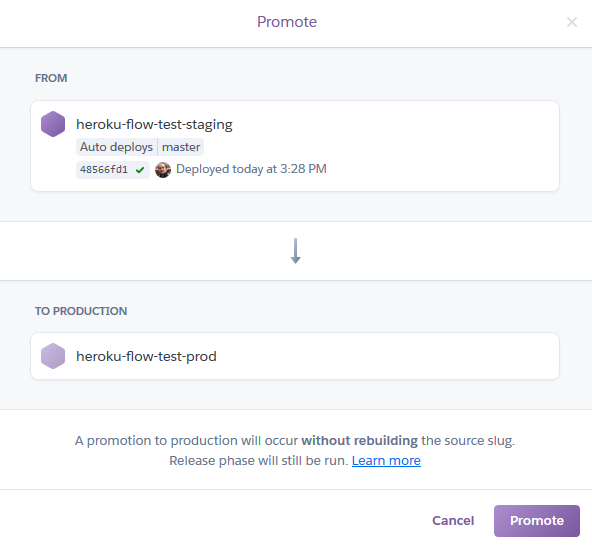
Be ready, once you click “Promote” it will be there in an instant.
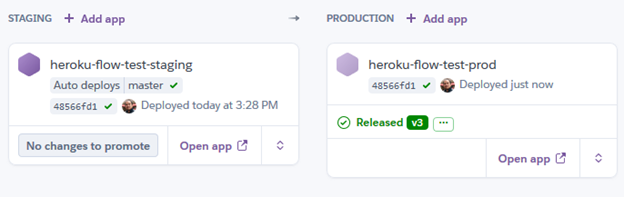
That’s it! We just took a code change all the way from the PR stage into production. Let’s zoom out and think about this in the context of some other competing products.
Let's Talk DevOps
My DevOps journey started with Azure DevOps – although at that time, it was called Microsoft Application Lifecycle Management. What is now Azure Pipelines used to be Microsoft Release Management, and that was the tool (along with on-premises TFS, Team Build, and Microsoft Test Manager) which formed the center of our CI/CD efforts. At the time, I was part of a small company which lacked standardized process and procedures, and so along with a couple others I formed an internal DevOps team to promote CI/CD across all of our company’s projects. That said, each project had a different setup; some had CI, some had CD, a few had CD only for dev/test, etc. In general, we just tried to do something under the assumption that something was better than nothing.
Since that time, I’ve gained experience both with Azure DevOps as well as GitHub Actions. Azure DevOps is still a somewhat strange blend of the legacy Release Management as well as the new YAML-based workflow setup, and GitHub Actions is just new enough that sometimes there isn’t a pre-built action to do exactly what you need it to. Both of these issues make it so that you need to spend more time and resources setting up and maintaining your CI/CD setup, increasing overhead costs.
Both of these solutions, however, are significant improvements over the older Microsoft tools, and it's easier than ever to get a basic CI/CD setup going for your team. I’ve also had the opportunity recently to use Netlify for this site, and with just a few clicks my CI/CD was up and running, review apps and all. That left me really wanting to find something similar for business use which would handle more complex use cases beyond a JAMStack app.
I’m happy to find that Heroku is offering a similar, no-hassle CI/CD experience, but with the additional flexibility of the rest of the Heroku platform. It’s hard to emphasize just how easy this was. I’m sure there will be complications later on, as there are in almost any DevOps task, but I generally find with DevOps that ease-of-use in the beginning continues to pay dividends even with more complex scenarios.
As for review apps, GitHub Actions doesn’t have it built-in at all. Azure DevOps is getting there, but this requires you to also set up and maintain Azure Kubernetes Service and the related cleanup. In contrast, Heroku Review Apps handles this all for you. Review Apps is really an awesome feature which allows for dev teams to easily get feedback from users and testers before merging into master, and I highly recommend it.
Review and Conclusion
Overall, Heroku Flow has impressed me with the feature set, intuitive integration with GitHub, and the ease of setup. I’m definitely going to be looking into this more both for myself and for my clients, as for smaller dev teams the ease of setup is invaluable, and even for larger teams any decrease in overhead means more time to focus on the actual development task.
If you have any questions or comments, my contact info is in the footer. Thanks for reading!